Translate

Showing posts with label ha designs. Show all posts

Monday, February 13, 2012

LOVE-ly Inspiration

I was inspired...
Pin It
A couple of weeks ago I saw an illuminated LOVE canvas on Pinterest. It captured my imagination and I found myself gathering supplies... I was so excited to make my own version. I HAD to get it done before Valentine's Day! Sooo... on Sunday I got to it! 

Supplies I used:
16 x 20 canvas
K & C Company Specialty Papers (Valentine's Themed) or whatever papers you like!
The Ultimate Glue
Hot Glue Gun
X-Acto Knife
Scissors
1 strand of 35 Rice-Style Lights (I found mine on Amazon, 3 strands - ready for more projects!)
Pencil


I had started formatting my letters and calculating the sizes earlier in the week on my Silhouette Studio software, I was ready to cut! Do you have a Silhouette? If you like how I've made my letters... it's your lucky day! Download all four files and you have a head start! :) All files are in Silhouette Studio format.


(Please do me the little favor of leaving me a comment, if you download... It's that validation thing I have a weakness for! I also want to make sure the file download worked like it should. Enjoy!)


Did I mention I LOOOVVVEE my Silhouette Cameo!!! I haven't even scratched the surface of what it can do! Here's the gorgeous paper loading into the miracle machine.

Once all the letters are cut out, place them as you would like on your canvas. Now trace around the interior light holes. This will make placing your letters back down super easy.
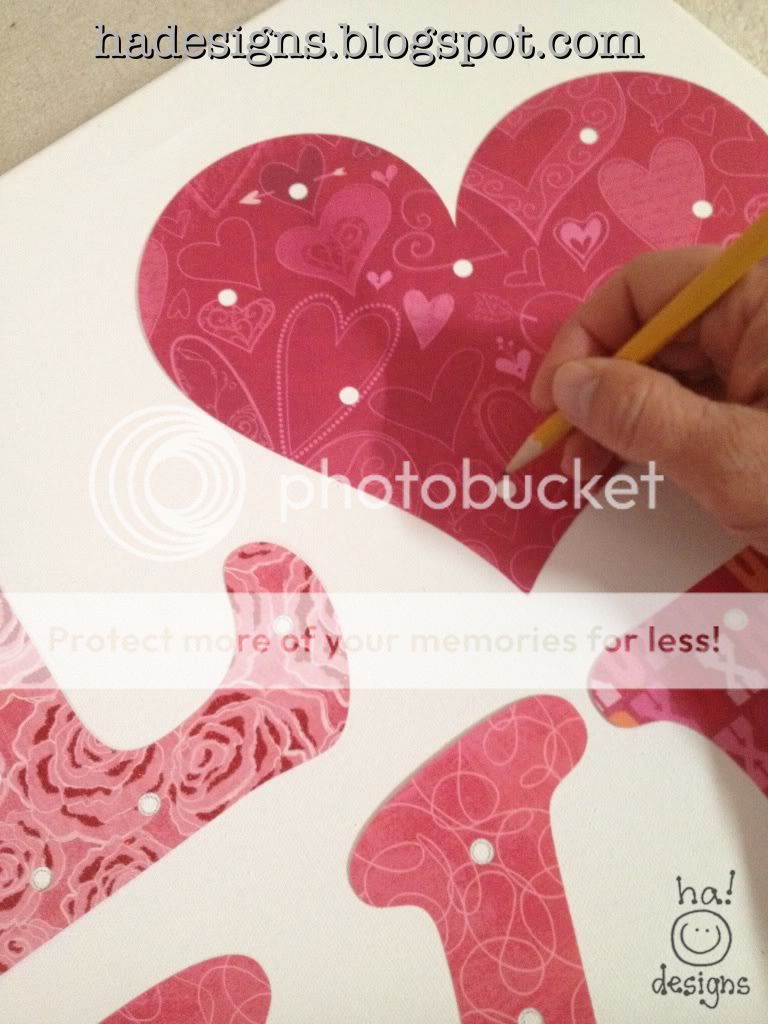

Then glue them down! I initially ran my letters through my Xyron, however they didn't seem to have a permanent bond to the canvas. I ended up having to lift them up and apply the Ultimate Glue. Now they are PERMANENTLY attached! :)

Once your glue has dried, it's time to pull out that X-Acto knife. (I am not responsible for any injuries... so be CAREFUL!) Cut out each of the 35 light holes. I used scissors to cut the last little flap off of the circle. This really made it a lot easier AND safer! You know... there is nothing funny about safety... Oh, I digress... 
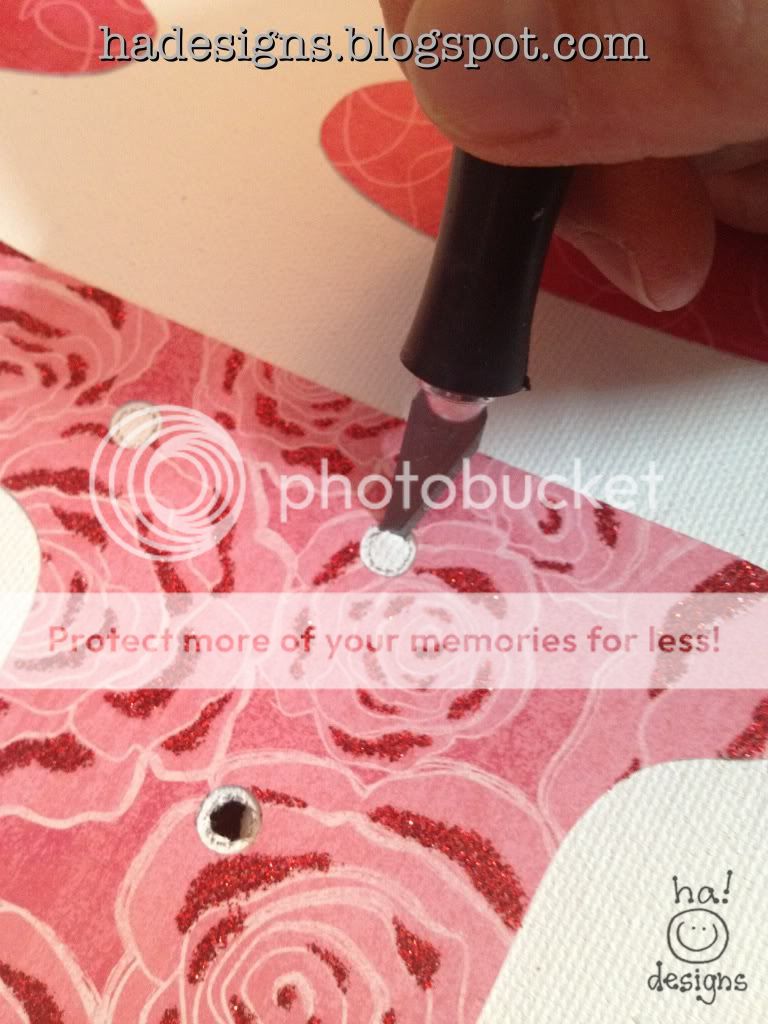

Get that light strand out... Now this is where it gets a little tricky. You need to make sure that your lights are going to reach all your little placement holes. If you are using my letters/layout it will work fine... if not make sure you take this into consideration prior to cutting out your light spacers. 

Turn over your canvas and decide where you want your cord end to plug in out of. I wanted mine to be at the "E." I knew where I was going to put it in the house and the plug would be easier to reach from that side of the canvas. I started with the light nearest the plug and the lowest hole in the "E," did a little measuring to make sure the lights would reach easily from hole to hole, then created a dot to dot! I numbered the holes in pencil so that when I started gluing I wouldn't make a mistake and end up having to start over! I went from the "E" up to the "Heart" down to the "L" and up to the "V." Figure out what works best for you! 

Time to glue! Yippee! Get that hot glue gun plugged in... (Also, test your light strand BEFORE gluing them in!) Now, you and I both know that when lights are plugged in they can create some warmth... so hot glue alone would not be good for this, you are using the hot glue to hold the light in while you wait for the Ultimate Glue to do it's job and dry and hold the whole thing in place... also if you feel your lights get too warm, don't leave unattended! (I have had mine plugged in for hours and it hasn't been an issue.)


I had a method to my madness here... I would hot glue 5 to 7 lights at a time and then go around them with the Ultimate glue, then move on to the next set. It makes it easier to get a good seal of glue all the way around them. 

Here's what the lights look like from the side:


Finished! It looks great unlit too!
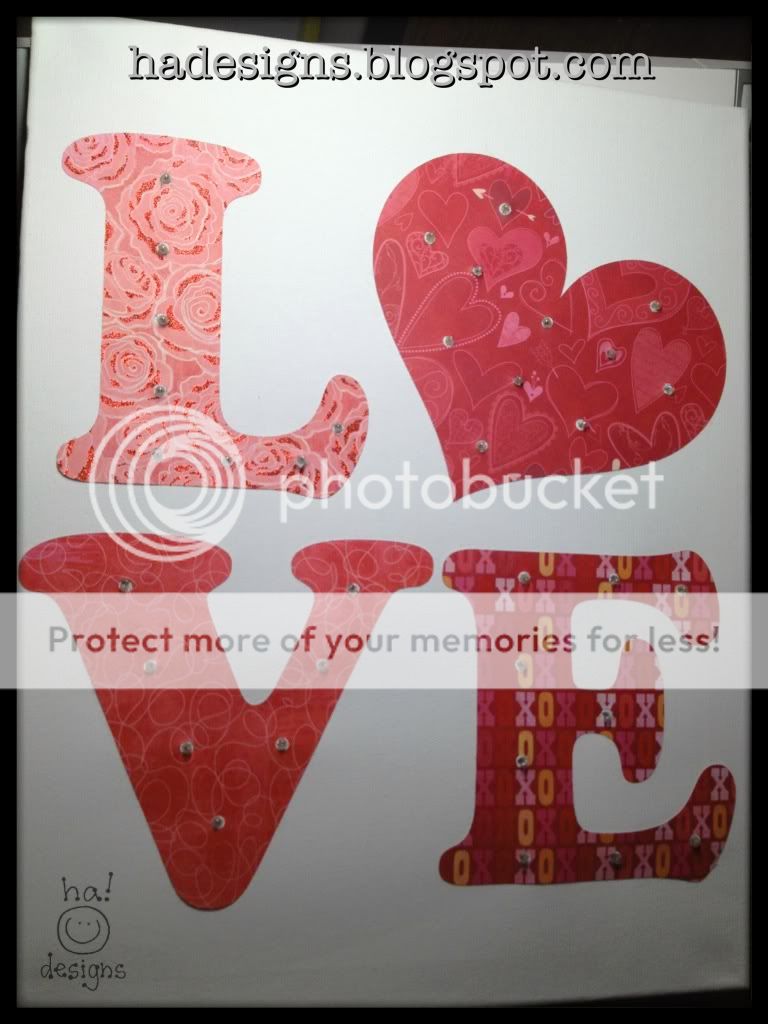

A fun and simply LOVE-ly (couldn't resist!) project!

Thursday, February 2, 2012

Day 33 : 02-02-12

Day 33 : 02-02-12 by ha! designs
Day 33 : 02-02-12, a photo by ha! designs on Flickr.
Cami & Clark... A pas de deux! Clark has to learn some ballet too!

Cami got exciting news today... She was accepted to Joffrey West summer intensive! Mia Michaels is one of the master instructors! She has now been accepted to 7 different programs... It's going to be a tough decision!

Wednesday, February 1, 2012

smells of home...


My house smelled like a home today... A delightful mix of home baked Orange Cranberry Bread and Spicy Thai Coconut Curry Chicken Noodle Soup. Deliciously fragrant AND simple to make!
So let’s get to it and share these recipes! 
Uploaded from the Photobucket iPhone App

Orange Cranberry Bread (Bread Machine)
ha! designs (adapted from Zojirushi)
Yield: 2 lb. loaf
Ingredients:
1 1/8 cups milk
1 large egg, beaten
2 cups all purpose flour
2 1/4 cups bread flour
4 tablespoons sugar
1 tablespoon dry milk (baker’s special dry milk)
2 teaspoons salt
2 1/2 tablespoons butter
1 teaspoon orange peel
1/8 scant teaspoon fiori di sicilia (citrus vanilla flavoring)
2 teaspoons active dry yeast
1 cup dried cranberries
Preparation:
Add to your bread machine according to manufacturer's instructions. Add dried cranberries at your addition time. Separate cranberries prior to adding. 
NOTE: I LOVE King Arthur Flour and use their flours as much as possible. The baker’s special dry milk and fiori di sicilia flavoring is also from King Arthur. You can click on them to take you right to the product page. Both are FANTASTIC!

Uploaded from the Photobucket iPhone App

Spicy Thai Coconut Curry Chicken Noodle Soup
ha! designs (adapted from Cooking Light, December 2008)
Ingredients:
4 cups water
3 cups fresh spinach leaves
1/2 pound snow peas, trimmed and cut in half crosswise
1 (5 3/4 ounce) package pad thai noodles (wide rice stick noodles)
1 tablespoon canola oil
1/4 cups thinly sliced shallots
2 teaspoons red curry paste
1 1/2 teaspoons curry powder
1/2 teaspoon ground turmeric
1/2 teaspoon ground coriander
2 garlic cloves, minced
6 cups, fat free, less-sodium chicken broth
1 (13.5 ounce) can light coconut milk
2 1/2 cups shredded cooked chicken breast (about 1 pound)
1/2 cup chopped green onions
1 red bell pepper, cut into 1 1/2” strips
1 (14 1/2 ounce) can straw mushrooms, (drained and rinsed)
1 1/2 tablespoons sugar
2 tablespoons fish sauce
1/2 cup chopped fresh cilantro
1 serrano chile, seeded and chopped, or 1/4 teaspoon crushed red pepper
1 red jalapeƱo, seeded and chopped
Lime wedges
Preparation:
  1. Bring 4 cups water to a boil in a large saucepan. Add spinach and peas to pan; cook for 30 seconds. Remove vegetables from pan with a slotted spoon; place in a large serving bowl. Add noodles to pan; cook 3 minutes. Drain; add noodles to spinach mixture in bowl. 
  1. Heat canola oil in pan over medium-high heat. Add shallots and the next 5 ingredients (through garlic) to pan; saute 1 minute, stirring constantly. Add chicken broth to pan, and bring to a boil. Add coconut milk to pan; reduce heat, and simmer 5 minutes. Add chicken, green onions, bell pepper, mushrooms, sugar, and fish sauce to pan; cook for 2 minutes. Pour chicken mixture over noodle mixture in bowl. Stir in cilantro and chiles. Serve with lime wedges.
I hope you enjoy these recipes and that your house also ends up smelling like a home...


Day 32 : 02-01-12


Day 32 : 02-01-12

Mmmmm... The smell of home cooked bread and a comforting soup! I made an Orange Cranberry Bread. It smelled so delicious as it baked! The soup I made is a Thai Coconut Curry Chicken Noodle Soup that was scrumptious! See my blog entry here for ALL the details!

Monday, January 30, 2012

Day 30 : 01-30-12

Day 30 : 01-30-12 by ha! designs
Day 30 : 01-30-12, a photo by ha! designs on Flickr.
Let the day begin...

The sunrise was gorgeous this morning. I dropped the girls off at school and then had to stop to capture this stunning start to the day.

Thursday, January 26, 2012

The Princess Card AND...

Oh my... it's been an awfully long time since I've played here... I am BACK! Ahhhh.... home. I definitely have some catching up to do with projects I've made and not posted. Oh well... A step at a time! :)

I have had the most fun the last couple of days working on a card project. I am the lucky aunt of many darling nieces that LOVE princess things. I had to create something that would be good for their birthdays this year! (Of course, I've already missed a couple of the princess nieces birthday's this year and sent them store bought *gasp* cards... I will most likely have to make up for that!)

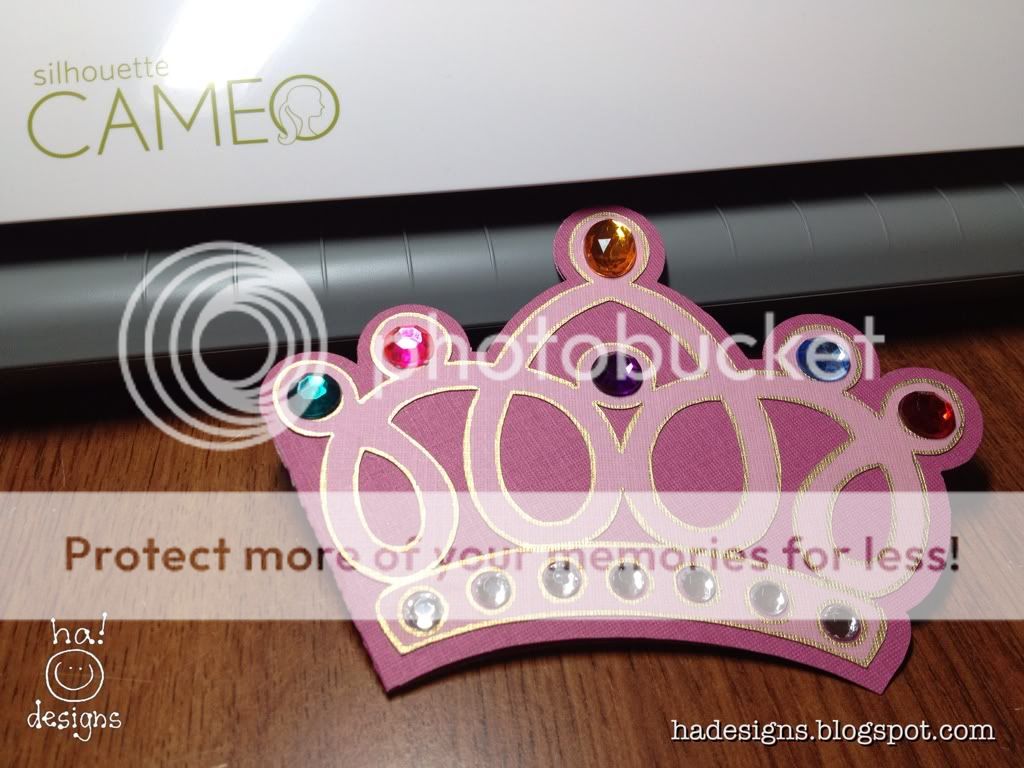
This is what I came up with:

Princess Crown Card


I can't think of many little girls who wouldn't LOVE getting a card like this! And the kicker is... after they read the pop-up "Happy Birthday" inside and my little personal message they get to WEAR IT LIKE A CROWN!!!! If you have seen any of my other cards you already know of my obsession of making cards that are "2 in 1!"

Day 25 : 01-25-12


OK... Hold me back... Isn't that just adorable?!!! (Mainly because my beautiful and oh so patient daughter is modeling!) I am so excited with how it all turned out! Yippee!

This was a fairly simple project, after figuring out what I was going to do... Now that I have everything like I want, the next ones should go a little faster. 

The Details & Supplies:

Silhouette Cameo (I LOVE this machine!!)
Card Stock - I used two colors
Xyron Sticker Maker
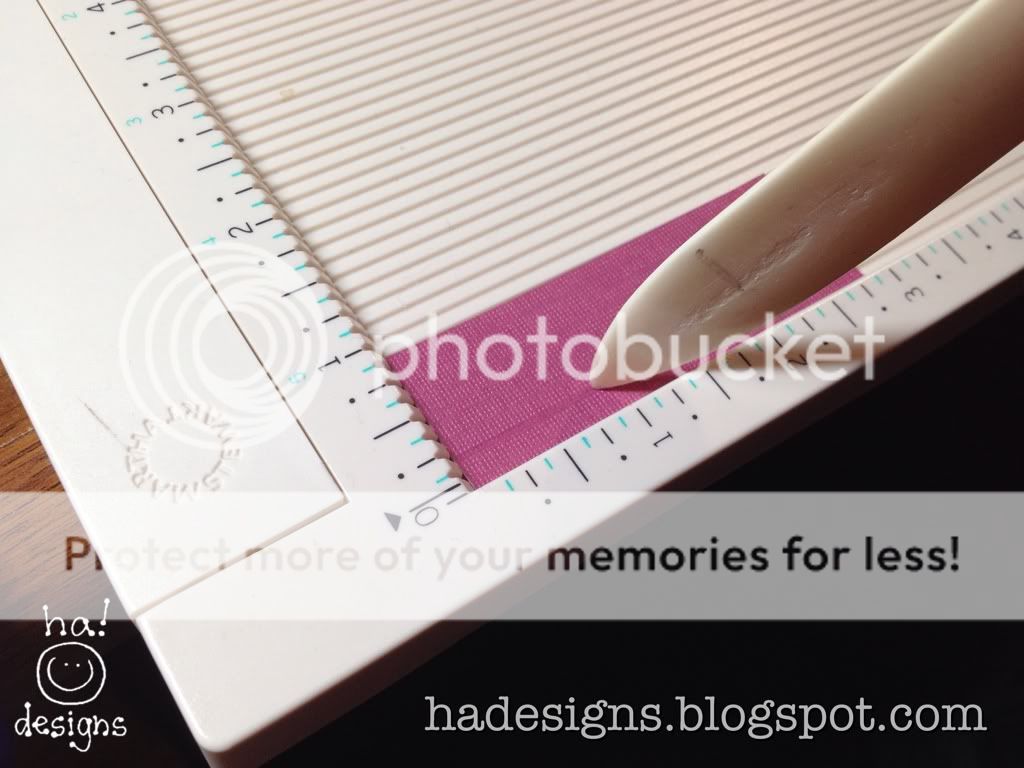
Fiskars Cutting Board & Martha Stewart Scoring Board  (Great Tool!)
Scissors
Turbo Tacky Glue
Gold Pen-touch Marker
Assorted "Jewels"
Tiny Hole Punch
Elastic Cord

I am a relative newbie to the Silhouette Cameo... I have had it long enough to TOTALLY love it however! I have created some of my own designs and I have altered many designs to what I wanted... I have total creative reign! Ahhhh... the power.... :) It truly is amazing!

I used two shape designs for this project:

I opened up the Crown Card shape in the Silhouette software and I resized both elements so that the card shape would completely fill my 12" x 12" paper. I then opened the "Happy Birthday" phrase on a new document. I selected those elements and adjusted the size to what I thought would be perfect for my pop-up element. I copied these and pasted them on to the same document as the crown/card. I did it this way because I plan on making multiples of this card so I will cut out all the elements in two different card stock colors. Then mix and match the pieces for 2 cards. If you want to make one card only then you will need to separate your card elements by colors on separate documents or deselect elements to cut. Now... let that lovely Silhouette Cameo cut out your elements! 

I used my trusty Gold Pen-Touch Marker to outline the filigree part of the crown. Ran it and the phrase (top word piece only) through my Xyron. Of course plain old glue works great here too! Just a little trickier on the tiny script. (Another option is to use the fabulous sticker card stock from the Silhouette store! Sometimes I make my own sticker paper before cutting... It works great!) Place the sticky pieces on their mates. 

Now.... Here's where the Pop-Up element begins! I ADORE pop-up cards and I use lots of different techniques. This time I used the "floating layer technique." This is one of my favorite! (OK... I admit it... They are ALL my favorites!) I love how the floating layers technique makes the design appear to "float" in mid-air! 

Here's how I did it for this card. First you begin by making the supports. Using scraps from the card base colored card stock I cut a piece 4 1/2" x 1". Scored down the length of this 1/4" from each edge. 


I then cut the long strip into 3 @ 1 1/2" lengths. Turned the strips over and scored across the width in half at 3/4". (My photos show these dimensions... I may adjust them to make the supports a little smaller for my subsequent cards.) 


Take each strip and make a small cut up the mid crease of each strip, to separate the hem and create the support "feet." 


Apply glue to one half of the inner face only (not feet) of each support. Close the support and press the two faces together. This completes the support form.


Carefully glue the base of one support EXACTLY over the gutter crease on the card. Glue the other two (one on each side of the center) down in line with the center. This is a small design so the support feet will be touching each other.  


Crease your "Happy Birthday" phrase down the middle. Apply glue ONLY to the central support and carefully join the central crease of the layer to the central crease of the support. 


Apply glue to the other supports... Flatten all three to the left (careful not to let the glue touch the underside of the floating layer yet!) Once all three supports are flattened to the left carefully lower the phrase layer onto the glued supports so that the whole structure lays flat. Make sure the glue adheres and then carefully pull the structure upright. 


Yippee! A POP-UP!!

Here's what the card looks like at this point...

Day 24 : 01-24-12


Now for the fun decorating! Glue all the jewels you like onto the front of the card. Ahhhh.... ssoooo sparrrkkklllyy! 

What about making it a crown?! Use a small hole punch and make a hole on each side of the back piece of the card only. About an inch up from the bottom or so. Thread the elastic cord through, tie a knot... I also punched out a larger circle of matching card stock to glue over the ends of the elastic cord to tidy it up and hopefully make it a little stronger. 


That's all there is to it! Enjoy!

I'd love to hear from you! Please leave a comment...

Tuesday, January 17, 2012

Monday, January 16, 2012

Day 16 : 01-16-12

Day 16 : 01-16-12 by ha! designs
Day 16 : 01-16-12, a photo by ha! designs on Flickr.
The clouds and tree really make the day seem colder than it was. The gloominess in this picture seemed appropriate for today... I discovered my car was egged sometime over the weekend. Extremely annoying!

Sunday, January 15, 2012

Day 15 : 01-15-12

Day 15 : 01-15-12 by ha! designs
Day 15 : 01-15-12, a photo by ha! designs on Flickr.
There was a brief magical moment when it sprinkled while the sun shined on the pool...

Saturday, January 14, 2012

Day 14 : 01-14-12

Day 14 : 01-14-12 by ha! designs
Day 14 : 01-14-12, a photo by ha! designs on Flickr.

Cami takes a private with one of her teachers today at the studio. She's preparing for another audition tomorrow. She worked very hard and did a fabulous job. I know she'll do well!

I loved the concentration on her face as she listened to her teacher.

Friday, January 13, 2012

Day 13 : 01-13-12

Day 13 : 01-13-12 by ha! designs
Day 13 : 01-13-12, a photo by ha! designs on Flickr.
I spy with my little eye...

a world of shape and color and much to be grateful for...

Thursday, January 12, 2012

Day 12 : 01-12-12

Day 12 : 01-12-12 by ha! designs
Day 12 : 01-12-12, a photo by ha! designs on Flickr.

I had some shopping to do today... Cami's birthday is right around the corner! 

I couldn't resist taking a break from the shopping to take a picture of this lamp post with lights radiating out from it. The brilliant blue sky was a perfect backdrop!

I'd love to go back at night sometime to take a matching picture...

Sunday, January 8, 2012

Day 8 : 01-08-12

Day 8 : 01-08-12 by ha! designs
Day 8 : 01-08-12, a photo by ha! designs on Flickr.

Summer intensive auditions begins! Today was the first of auditions for various companies that will last all month long. 

After the audition I helped Cami with her Honors Biology. I had fun relearning Punnett squares and a little genetics. It was so nice to spend a couple hours together figuring it out. She doesn't ask me for help very often anymore. I love that sometimes she still needs me... I'm so proud! She's such a great student! 

UPDATE 01-23-12: Cami was accepted to Joffey Ballet School in New York City!

Saturday, January 7, 2012

Day 7 : 01-07-12

Day 7 : 01-07-12 by ha! designs
Day 7 : 01-07-12, a photo by ha! designs on Flickr.
The living room has returned to normal. Today we took down all the holiday decorations... I am happy to have the simple living room back, although I always love the beautiful, festive holiday decorations.

Friday, January 6, 2012

Day 6 : 01-06-12

Day 6 : 01-06-12 by ha! designs
Day 6 : 01-06-12, a photo by ha! designs on Flickr.
Walter... He's definitely our lucky cat. We found out a couple of weeks ago that he's most likely 10 to 12 years old. Definitely older than we thought he was. Our sweet rescue kitty.

I took this photo as Walter did a little sunbathing in the backyard. It was a beautiful 75 degree day. Lovely!

Thursday, January 5, 2012

Day 5 : 01-05-12

Day 5 : 01-05-12 by ha! designs
Day 5 : 01-05-12, a photo by ha! designs on Flickr.
Today was an early release day for Cami. We go out to lunch together every couple of weeks. These moments mean so much to me.

Wednesday, January 4, 2012

Day 4 : 01-04-12

Day 4 : 01-04-12 by ha! designs
Day 4 : 01-04-12, a photo by ha! designs on Flickr.
Today was another beautiful day with temperatures in the 80's! We've had weather like that since Christmas.

Clark got stress colitis when we left him for a few days while we were out of town. Now he's all better and begging to play, as usual!!
Related Posts with Thumbnails